Friday, July 29, 2011

Enjoy Summer While It's Still Here

The commercials for back-to-school clothing and supplies have already been playing on television for a couple of weeks. It seems too soon, but schedules will only get busier with school and extracurricular activities on the horizon. Create some memorable outdoor experiences with your kids.

• Have the kids eat breakfast outside. Outside can be the front stoop, a porch, a patch of grass beneath a tree. Breakfast can be simple – muffins and juice, Canadian bacon between a couple of waffles. Bring a thermos of coffee for yourself.
• Take a walk around the neighborhood … when it is raining.
• Collect leaves or flowers and press them between the pages of a dictionary.
• Go to a farmer’s market. Give each child one dollar to make a purchase of something for dinner.
• Count the number of birds that visits your feeder over five or ten minutes.
• Have a picnic lunch or supper in the backyard, at the park, at the beach, at the local forest.
• Read a bedtime story outside by flashlight as the day’s light fades.
• Lie on blankets and watch the stars come out.

Outdoor time doesn’t have to involve elaborate experiences but simple moments when everyone is present in the activity.

Thursday, July 28, 2011

Nature Play Along the Way for All Ages

In 1997 I entered the field of environmental education as a field trip leader for a 2000-acre suburban wildlife sanctuary. As I sat through the training, I realized that third graders knew more about the natural world than I did. As a kid I rode my bike up and down the street for endless hours. As a preteen, I walked with a friend around the field that was her backyard. Aside from worrying that snakes were going to bite me, I didn’t give much thought about nature.


As an adult though, a new world opened up as I joined nature walks and learned the names of small green plants and shrubs and trees. I learned about the secret worlds of amphibians and arthropods, birds and mammals. The more I read and the more I learned in informal classes and workshops, the more things made sense. Instead of facts, nature was a story. People and plants and animals and even rocks were interconnected.

Teaching classes helped me to process what I learned. However, working with kids isn’t just about conveying facts. It is about getting them to interact with nature. So, as I became involved in the day camp at the wildlife sanctuary I started reading books describing activities adults could guide kids through outdoors.

I collected hundreds of activities and variations on those activities. I kept meaning to turn them into a book, but the format was never clear – should I gear the book for kids, for parents, for teachers … who? Every time I sat down, I tweaked the format and my notes became more and more disorganized. During that time, my mother required more help and then spent years going in and out of hospitals and nursing homes until she died; my work schedule changed and then changed again (and then changed again); I moved three times in three years after previously living at one address for years and years; I met a man, fell in love, and married him; I changed my career from teacher to writer; I helped my father get by living on his own until he had to move into assisted living, which hasn’t yet made things easier because now I’m cleaning the house – and my parents never got rid of anything (even empty boxes).

Before the end of September, my Nature Play Along the Way series will be e-published and available through BarnesandNoble.com. The series will consist of
Games on the Go – Walking Games for Parents and Kids
Nature Play Along the Way for PreK – K
Nature Play Along the Way for Grades 1 & 2
Nature Play Along the Way for Grades 3 & 5
Nature Play Along the Way for Teachers
(Activities that require eight or more kids)

Each book guides adults, be they parents, grandparents, teachers, scout leaders, youth group leaders, camp counselors, or afterschool teachers through nature activities that they can do with children, even if the adults don’t have a background in environmental education, science, nature, etc.

Why mention the books now? Well, as I mentioned, I’ve been working on the books on and off for years and I need an incentive to finish them. Telling ‘the world’ is (with hope) that push I need to write, revise, and edit this series. So, get set to explore ….

Monday, July 25, 2011

Walking Games with Kids


Whether you’ll be walking in the wood, through a park, along a city or suburban sidewalk, or, perhaps, through the mall, these walking games will engage young children. If older children think the game is too silly, then have them take turns leading the game or place them in charge of younger siblings.

Animals on the Move
Have the children pretend to be animals while walking from one spot to the next. At the beginning of this game you can select one or two animals and call them out randomly. Children must then act out that animal’s behavior for ten-to-fifteen seconds.

Fox – Red fox “perfect step,” which means that all four feet move in a single line and that the back feet step in the prints left behind by the front feet. Have the children walk placing one foot in front of another in a straight line.
Rabbit – Hop with feet together.
Hawk – Hold arms out to the side and pretend to soar.
Ant – Crawl along the ground in a straight line.
Geese – Try to walk so all participants are moving in a v-shape.

After introducing each animal and calling out the actions for the children to act out, you should be able to call out the animal’s name at any time and the kids should respond.

Animal Antics
This version allows for more random actions. If you are walking with children who are arguing about who gets to walk at the front of the line, this activity will eliminate the pushing and shoving by rotating the children from the front to the back of the line. Start by telling the children that when the leader make an animal sound, they must then act out the behavior of that animal for a count of ten while continuing to walk.

Select a child to be the leader. Point out a spot up ahead and tell the child that when the group reaches that point she should make an animal sound. (Why point out a place for the child to make the call? Depending on the child’s age, she may make an animal sound immediately upon it becoming her turn and then the group doesn’t get to move very far.) When the group hears the animal sound, they then act out the behavior they believe most appropriate. Rotate leaders.

The challenge with this game is encouraging the children to make the sound loud enough for the other children to hear. As the leader, you can help support the child-leader by encouraging them to repeat the sound as they turn to face the other children.

Now, get walking!

Thursday, July 21, 2011

Photography for Kids – Go Out and Take Pictures


The past three days I’ve given tips and “assignments” that can help kids (really anyone) take better photographs. Reading tips, however, isn’t enough; kids need to explore nature with a camera in hand. The nature can be in their backyard, at a state forest, or at their summer camp. Kids can give themselves a goal – take 25 pictures a day, for example. They could take 25 pictures in ten minutes or over the course of ten hours. If they find an interesting subject they could take additional photographs.

I know a graphic designer who received a camera one Christmas and made it his goal to take 100 pictures each day, thereby teaching himself how to be a photographer. Granted, he had a trained artist’s eye, but still, he did a lot of experimentation as he played with the best angle to photograph ice and learned how the lighting at different times of day affected the forest, the field, water.

The first thing, of course, is that kids need access to a camera. There are enough inexpensive digital cameras that will allow a kid or teen to experiment without the concerns that come with borrowing mom or dad’s camera for a day. Here are some other tips for kids …

- Read the manual. It may be boring but it will tell you about features on the camera that you might overlook.
- Keep the batteries or camera charged. Have an extra set for backup. I’ve known a lot of kids that have had to stop taking pictures because their batteries died ten minutes after they turned on their camera.
- Download photos regularly and clear you memory card. There is nothing worse than losing a photo-taking opportunity because you are scanning through your camera’s memory trying to decide what to delete.
- Set a goal each day. Take pictures at different times of day. Do the “assignments” in composition, lighting, and angles.

Wednesday, July 20, 2011

Photography for Kids – Angles


Changing the angle at which you take a photograph is one of the most fun and easy ways to create interesting photographs. Instead of taking a picture head-on from the obvious “front” you produce imagines that get viewers to pause and maybe even think about what you are showing them.

By walking around a subject kids may discover a “secret” about that object that others overlook. By changing the tilt of the camera, kids can manipulate an image so to make it look larger or smaller

If you hold the camera high and angle it down, you can make something look smaller or foreshortened. Angling the camera is an easy bit of ‘trick’ photography; although you’re not creating an optical illusion, you are making people see the subject of your photo in a different way than they may normally have view that subject.

Walk around one interesting subject and take a
__Front angle
__Back angle
__Left angle
__Right angle

Select one subject and take a
__High angle
__Normal angle
__Low angle
__Take a picture while holding the camera at a small tilt
__Take a picture while holding the camera at a medium tilt
__Take a picture while holding the camera at a large tilt

Check out more fun art projects in by eBook, Art in Nature, Nature in Art.

Tuesday, July 19, 2011

Photography for Kids – Composition


I’m focusing on photography for a few days because it’s summer and kids go to camp or on vacation or do things they don’t normally do. This all adds up to opportunities for taking pictures. Whether kids have a disposable film camera, a digital camera, or a camera in their phone, they can practice some of the skills that will improve their pictures.

The activity below is a to-do list of sorts from my eBook Art in Nature, Nature in Art. If kids work their way through the list, not just once but several times, using different subjects, they will teach themselves how to take interesting photographs. In this case, interesting relies upon composition or where things are placed in an image. In some cases, kids can move something around before they take its picture, but in most cases the object is where it is. When kids can’t move the objects around, they can change their position, which will allow also them to modify their picture.

For example, stand back from a tree and take a picture of it from the ground to the leafy crown – this is a 3/3 crop. Move in closer and eliminate the bottom 1/3 of the scene and you have a 2/3 crop (because you can see 2/3 of the entire subject). If you go closer (or use a telephoto lens) to focus your picture on the leafy top of the tree you’ll have 1/3 crop. Don’t worry about dividing a subject exactly in thirds.

Another thing to think about is the Rule of Thirds. Imagine a grid that divides the image into thirds horizontally and vertically. A photographer should line up the subject of their photo along one of the imaginary horizontal or vertical lines. This allows the viewer’s eye to flow across the image without jerking here and there without settling.

__Take an overall picture of a scene
__Move in for six detail pictures
__Hold the camera vertically
__Hold the camera horizontally
__Take a picture at a tilt
__Crop an image 1/3
__Crop an image 2/3
__Crop an image 3/3
__Fill the frame with the subject
__Place the subject on the left 1/3line
__Place the subject on the right 1/3 line
__Place the subject on the bottom 1/3 line
__Place the subject on the top 1/3 line
__Place the subject on a “hot spot” – where vertical and horizontal lines meet

Monday, July 18, 2011

Photography for Kids – Lighting

The bright summer may be the most challenging light to take photographs in – particularly at midday. The lighting is harsh and the shadows create sharp contrasts. Maybe the best way for kids (and adults) to learn how to handle the challenges of natural lighting is to go out and take photographs in different conditions.

Unlike indoors, lighting isn’t something that you can control when you’re outdoors – or can you? You and your child can go to a location at different times of day to experience a variety of lighting situations. Let’s say you are vacationing beside a lake. You could take pictures of the lake from the same vantage point at sunrise, early morning, noon, late afternoon, early evening, sunset, and even at night. Kids could take pictures on a cloudless day, a partly cloudy day, and a cloudy day (even a cloudy day can have different lighting throughout the day).

Even if you are at home, kids can go into their yard and take a picture every day (or a few times throughout the day). Take some notes on paper or rename the pictures on the computer to note the lighting. It may seem like a bother at the time, but remind kids that they probably won’t remember the details a few days or a few months from now. Again, all of these experiments allow you to know what will work in the future. Learn to Take Beter Photographs.

__Take a picture in direct sunlight
__Take a picture in shade
__Take a backlit picture (the sun is behind the subject)
__Take a picture with the flash in direct sun
__Take a picture with the flash in shade
__Take a picture with the flash with backlighting


Wednesday, July 13, 2011

Nature Word Games for Kids


This word game relies on pathetic fallacy (a phrase that kids ages nine or ten and up will love to learn because it sounds so odd). Pathetic fallacy is the granting of human emotions to non-human things. When we say the flowers look happy or a scrawny tree seems sad, we are casting human emotions on the things.

For this activity you will need a stack of 3” x 5” index cards. On the cards, draw simple faces exhibiting different emotions. Go online and look for emoticons if you want some ideas. Draw the face and write the emotion underneath. You’ll want to start with a deck of at least twenty emotion cards. If you are doing this activity with a large group, plan on at least two cards for each child. During the play of the game, different children can use the same card.

Hand each child one of the cards. If the child can’t read the word, ask them what emotion they think the face is showing. Explain that their goal is to look around and find something that represents the emotion on their card. If children are confused, ask them to imagine life as a rock. Would the rock feel happy, sad, or bored?

If you have a group, you can warm up to this activity by asking them to imagine if different objects had emotions what feelings they would have? In poetry, the pathetic fallacy is the practice of attaching human emotions to nature, animals, and inanimate objects. You may decide to give this brief literary lesson to preteens or teens. With younger children, this activity can lead to a discussion of how things that aren’t alive don’t have feelings.

With a small group, when a child finds an object that represents the emotion on his card, the child can call the group to stop, point out the object and then allow the others 10-to-20 seconds to guess the emotion. With a large group, you could create a list poem, in which children connect the emotion to an object they saw on the walk. This poem also uses similes, or comparisons.

For example,
As stubborn as a rock
As bored as a fence
As flexible as a twig
As calm as a leaf

This activity connects a child to their own emotions as well as encourages empathy toward other things (and people).

For more word fun, try Writing Activities for Kids who Don't Like to Write and Write and Illustrate a Book of Poetry with Kids.

Tuesday, July 12, 2011

Nature Observation Games – A New Way of Seeing


It is easy to get caught up in walking and talking and looking straight ahead in the direction you’re headed. If we hear a noise, we may look up. If the footing is uneven, we may glance down. However, what do we miss by not looking up, down, and side-to-side as we walk? What do we miss by not noticing some of the smaller details along the way?

These two activities will get you and your children looking at those smaller details with a couple of games. ‘Angles’ can be played with any age. With young children, you may need to hold the object at the item you want them to describe. ‘Camera’ is appropriate if you are with one child or you have an even number of children who are at least seven years old and up so they can safely lead a partner wearing a blindfold. As always, you best know the children you are with.

Angles
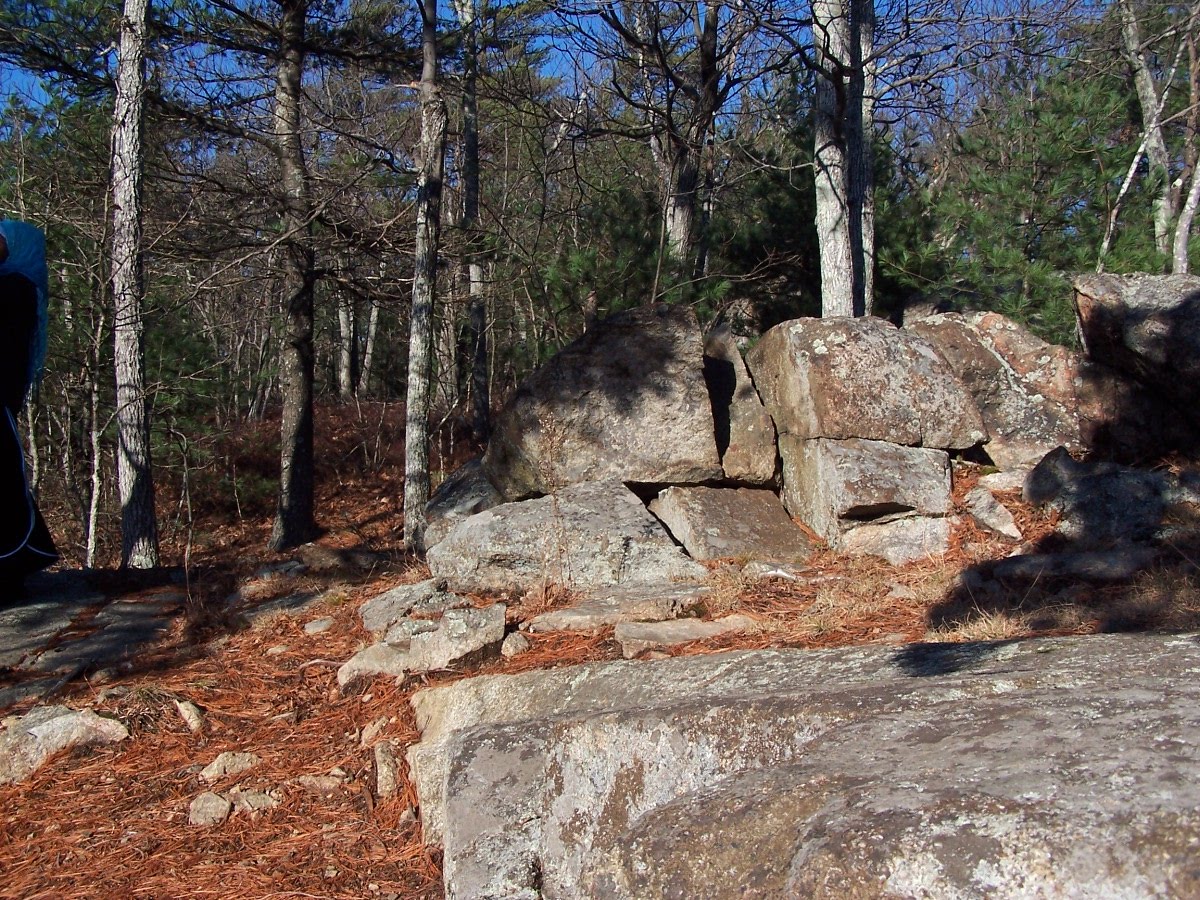
You can do this activity one of two ways depending on if you want to use something small that you can hold or something large that you can stand next to. With a small object, you can either stop to pass it around or you can pass it among the children you are will as you walk along.

If you find something small, you hold it and describe it. The next person takes the object and describes it in a different way. Recommend that the child turn the object so she can look at it from a different angle. Continue passing the object around, each child describing it in a different way.

Remind children that they can use senses other than sight. How does the object sound if they run their finger down it? What does the item smell like? What is the object’s texture? (The children should avoid using their sense of taste.)

If the object is too large to hold – say a building or a statue, stop to gather around the object. Again, each person describes a different detail that they see, hear, smell, or feel. If the group is large, this may seem too challenging, but look at it as a way for the kids to use their creativity and imagination.

Large or small object, because children can’t repeat something else that someone else has said, they must not only use their observation skills but also pay attention to what the other children in the group have said.

Camera
Look for an area that offers a variety of things for individuals to observe. Since one player will have his eyes closed during much of the game, you may want to select terrain that the children with you will be able to physically manipulate.

One player (the photographer) leads another player (the camera) with her/his eyes closed to an interesting object. The photographer aims the camera and taps the camera’s shoulder or gently tugs on the camera’s ear. The camera opens its shutter (eyes) for 3-to-5 seconds then closes its shutter. After a few exposures, switch positions. Afterward, you could have students draw a picture of the most memorable thing they saw.

Introduce one of these games on a walk and save the other for another time. Both of these activities can easily work into your repertoire of walking games as they require no planning or supplies, just an awareness of the place around you.

Monday, July 11, 2011

Exploring Color in the Outdoors – Activities with Children

Color activities aren’t limited to preschoolers who are learning their colors. Color hunts and matching games can help young artists notice how the variety of hues around them goes beyond what a box of crayons or paint palette offers. Color activities work on observation skills and help children and adults become more aware of their surroundings. For more art-oriented activities, see my book, Art in Nature, Nature in Art.


Color Hunt
Go to the paint department of your local hardware store and gather an assortment of paint chip samples. Cut the paint strips into individual colors. For younger children who may be overwhelmed by the subtle variations of color offered by paint manufacturer’s, use a box of crayons so the children can stick with general colors.

On a walk, give each child one-to-three of the color chips. While walking, they should watch for items that are a close match to the examples. When they find a match, they can trade that color sample for another. You can also stop along the way and hand out color chips for the children to match while at that particular location.

Quick Colors
While walking, the adult stops and calls out “quick colors.” Everyone freezes for a count of ten and then starts calling out the different colors they see. Although younger children can be satisfied calling out colors like “green” or “blue,” older children can try to be more specific and imaginative and name colors as “blue-gray,” “cheddar cheese,” or “grape jelly.”

Just One Color
At any point during the walk, ask the children to look for items that share one particular color. Make the walk a challenge and select a color that doesn’t seem to be predominant in the area. Objects can be natural or manmade and can be any size. Depending on where you are walking, look for yellow in a swirl of a ball, the frame of a trampoline, a flower. If you are taking this walk with young children who are still learning their colors, bring along a crayon or piece of construction paper to show the color.

Friday, July 8, 2011

Super Simple Sun Prints

You don’t need to hunt down that special blue sun print paper to entertain your kids with this art project. This technique even allows you to skip developing the print under water. Chances are you have the supplies at home – ordinary construction paper and something to hold lightweight objects in place.

Materials for Crafts
You need construction paper that hasn’t already been exposed to the sun (by sitting on a tabletop, etc.).

You’ll also need different objects with interesting shapes. This project is a great way to get kids to focus on the shape or silhouette of an object. For preteens, they may recognize this concept as positive and negative space. (Learn what that means and get a couple of art project ideas at Positive and Negative Space Art Projects and Positive and Negative Space Cut Paper Designs.) This is an inexpensive project, so kids can experiment and discover the silhouettes that various objects will leave behind.

For lightweight objects that might blow away, you’ll need pebbles or pins
that will allow you to hold those items in place.

A sunny day

How to Make a Sun Print
You’ll need to work in an area that will get sunlight for two or three hours. Work on a flat surface – short grass is okay.
Set down the paper.

Place the item or items on the paper. If the items will blow away (as leaves will), weigh them down with small pebbles or use map pins or push pins to tack the item to the paper. Make certain that the pebble or pin is on the object and that it’s not sitting full on the paper or it will create its own shape.

Leave the items in the sun. Check after two hours by lifting the items just a bit. The dye in the paper is protected by the object. The paper that wasn’t covered will fade in the sun.

Ta dah! You’ve created a sun print of an object. Experiment with items that have a variety of shapes.